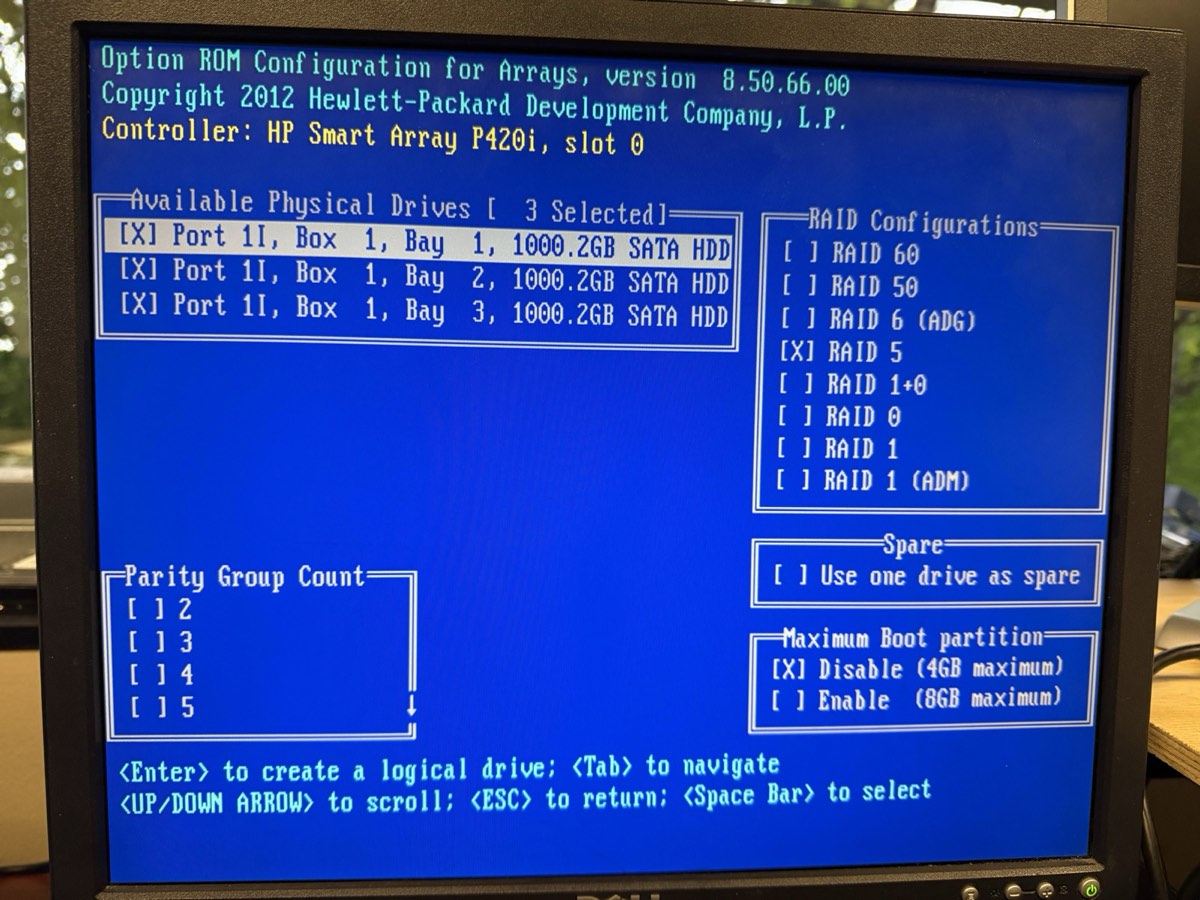
3 drives = RAID 5 is the natural fit — minimum met, best space efficiency (66%)
Survives 1 drive failure without data loss — matters with our mixed-age drive pool
3 TB total comfortably hosts 4 planned VMs plus ISOs + snapshots + backups
Hardware RAID on P420i is faster than ZFS on this generation — and doesn't need HBA-mode flashing
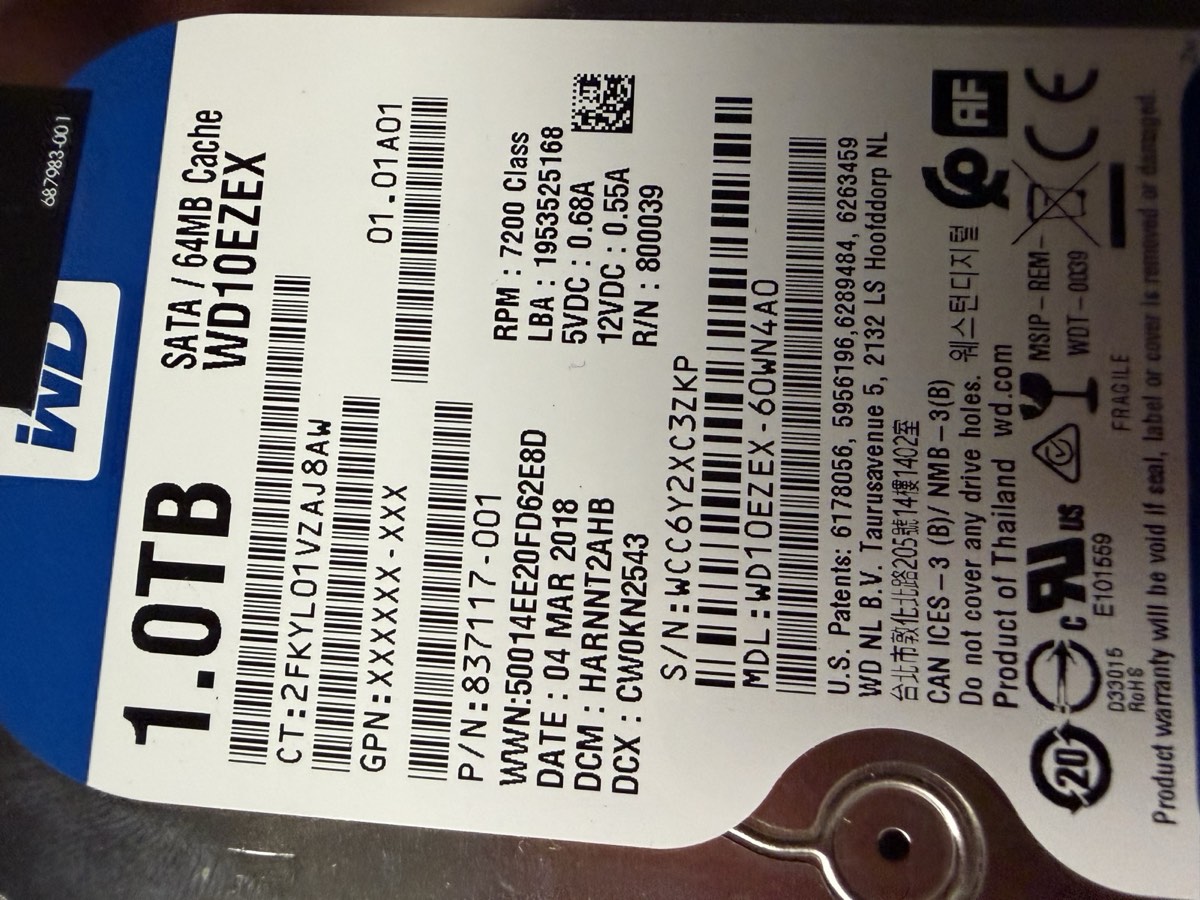
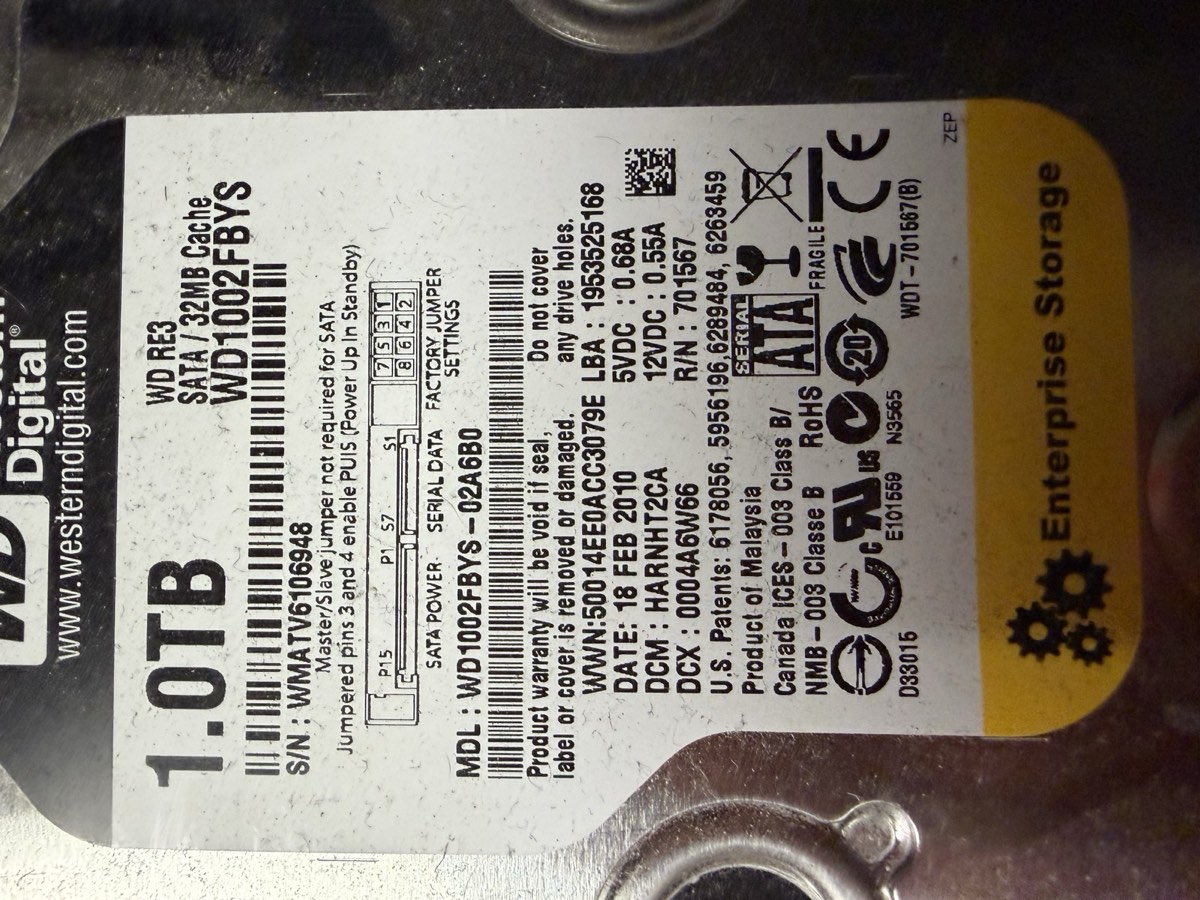
⚠ Caveat: drives are mismatched — WD Blue (2018, consumer, no TLER) + WD RE3 (2010) + a 3rd. Operate at the slowest member's speed; the oldest drive is statistically most likely to fail first. Weekly SMART checks recommended.
Result: 1 logical drive · 3 TB total (one drive's capacity reserved for parity) · parity initialization began in the background.
Chapter 2 · Verification
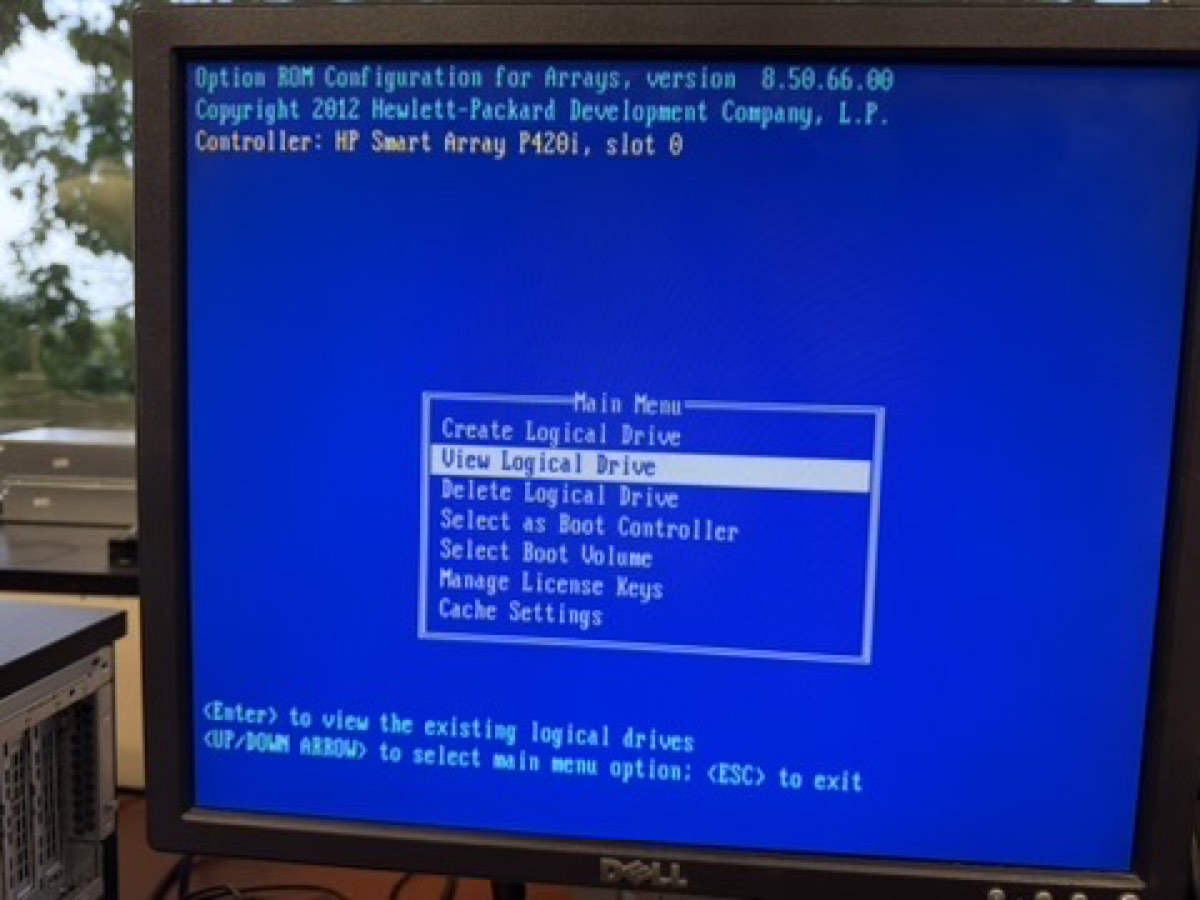
POST confirmed the array
↑ ORCA main menu after creation — "View Logical Drive" is now selectable, which means an array exists ✓
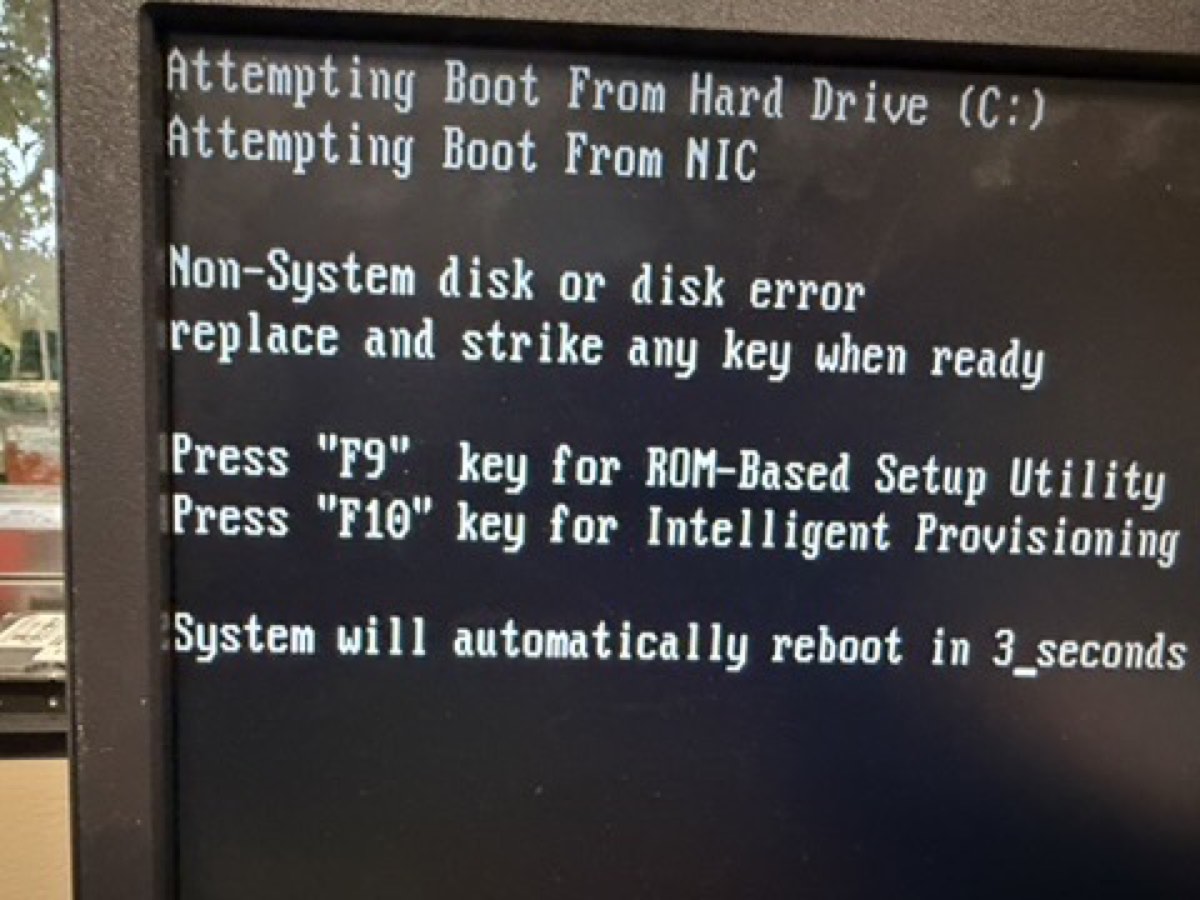
↑ Next boot: "Non-System disk" — exactly what we wanted. Server sees the array as C:, just no OS yet. The 1785 "array not configured" error is gone.
Chapter 3 · Hypervisor Install
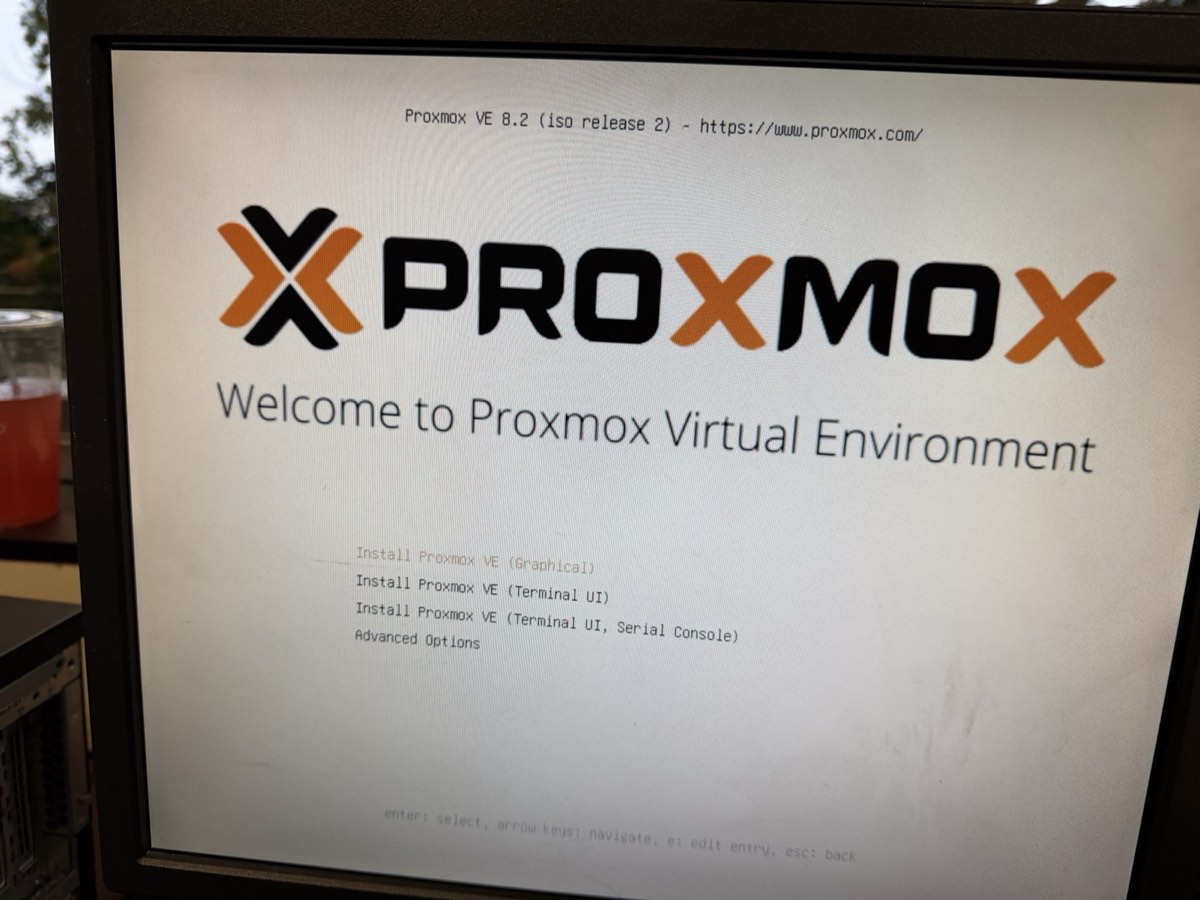
Booted Proxmox VE 8.2.2 via iLO virtual media
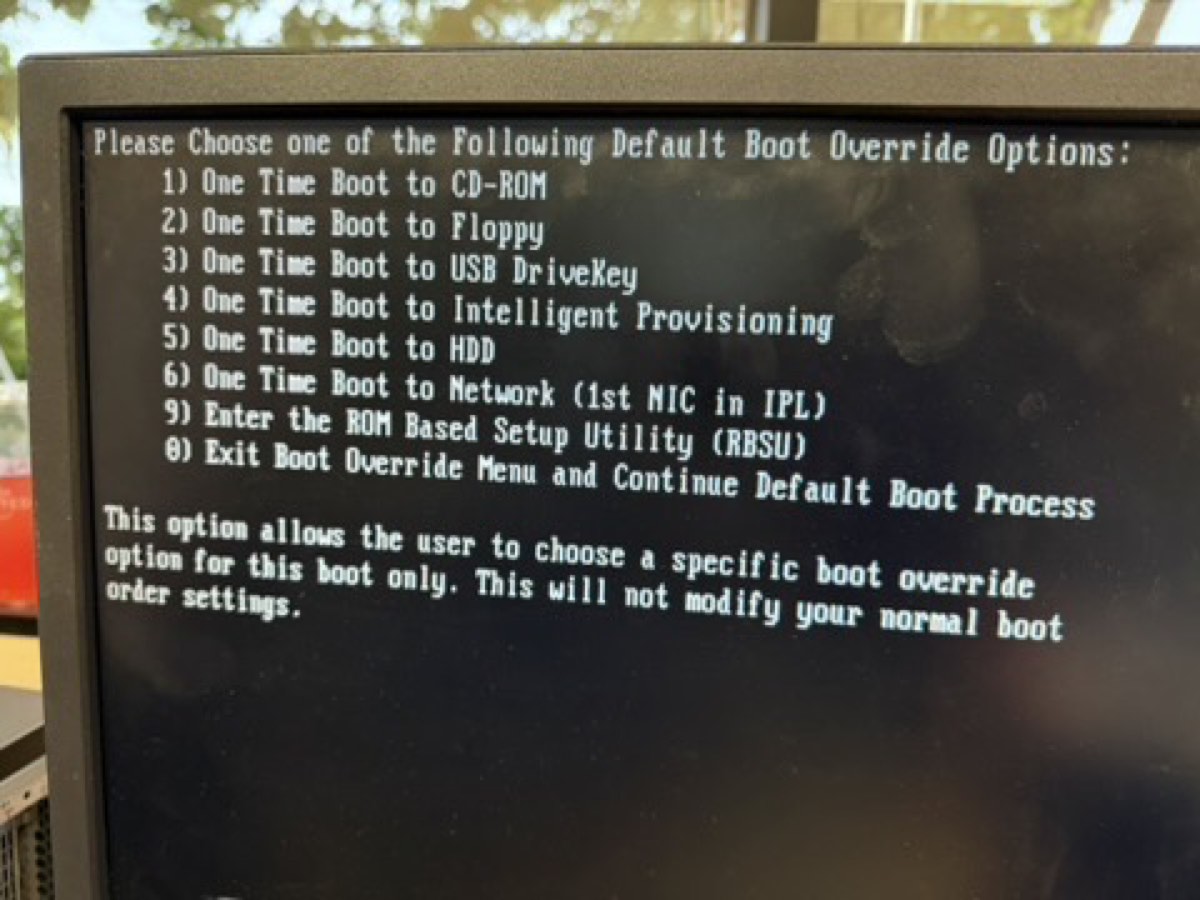
F11 at POST → option 1 (CD-ROM) — iLO serves the ISO as a virtual CD
Proxmox installer loaded — picked "Install Proxmox VE (Graphical)"
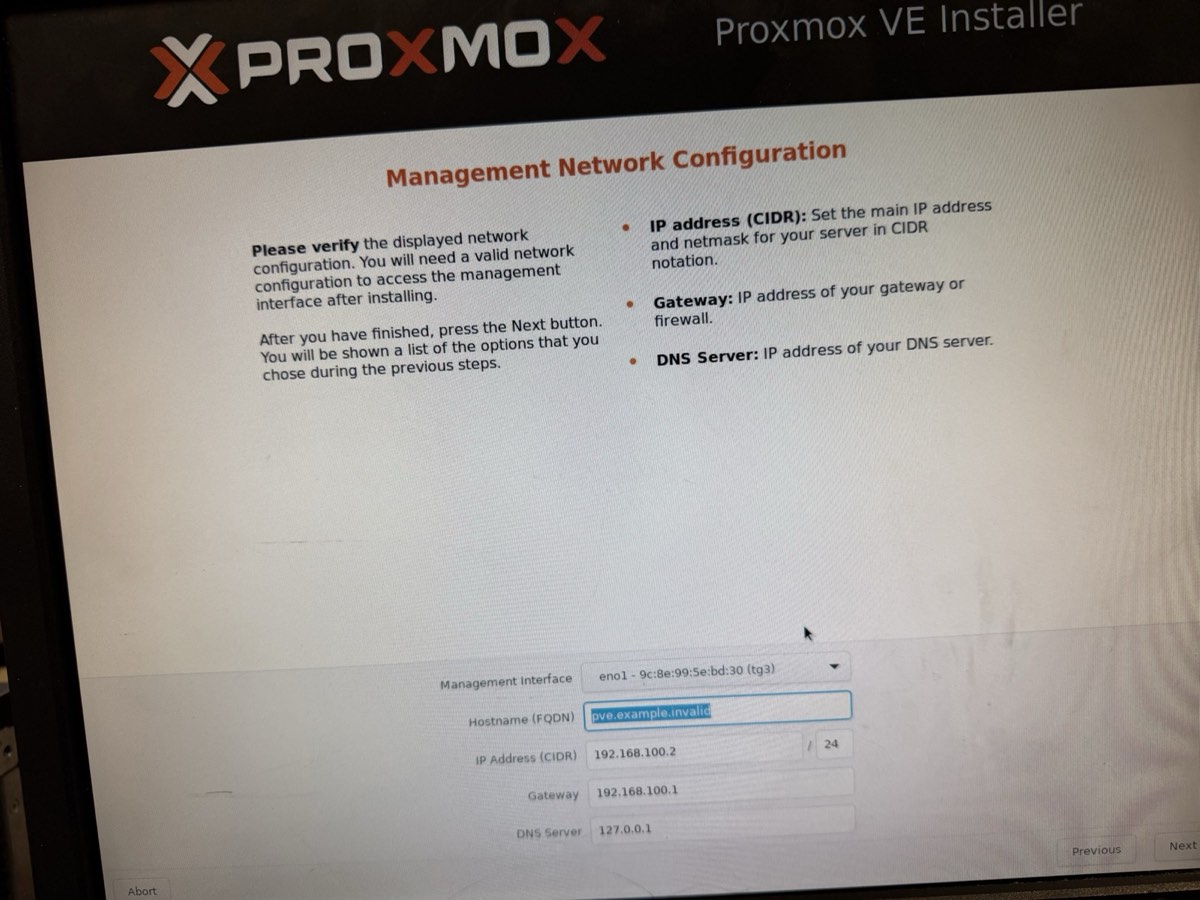
Management network configured on eno1
No USB stick needed — iLO's virtual media mounted the ISO straight from a laptop browser.
Chapter 3 · Install Summary
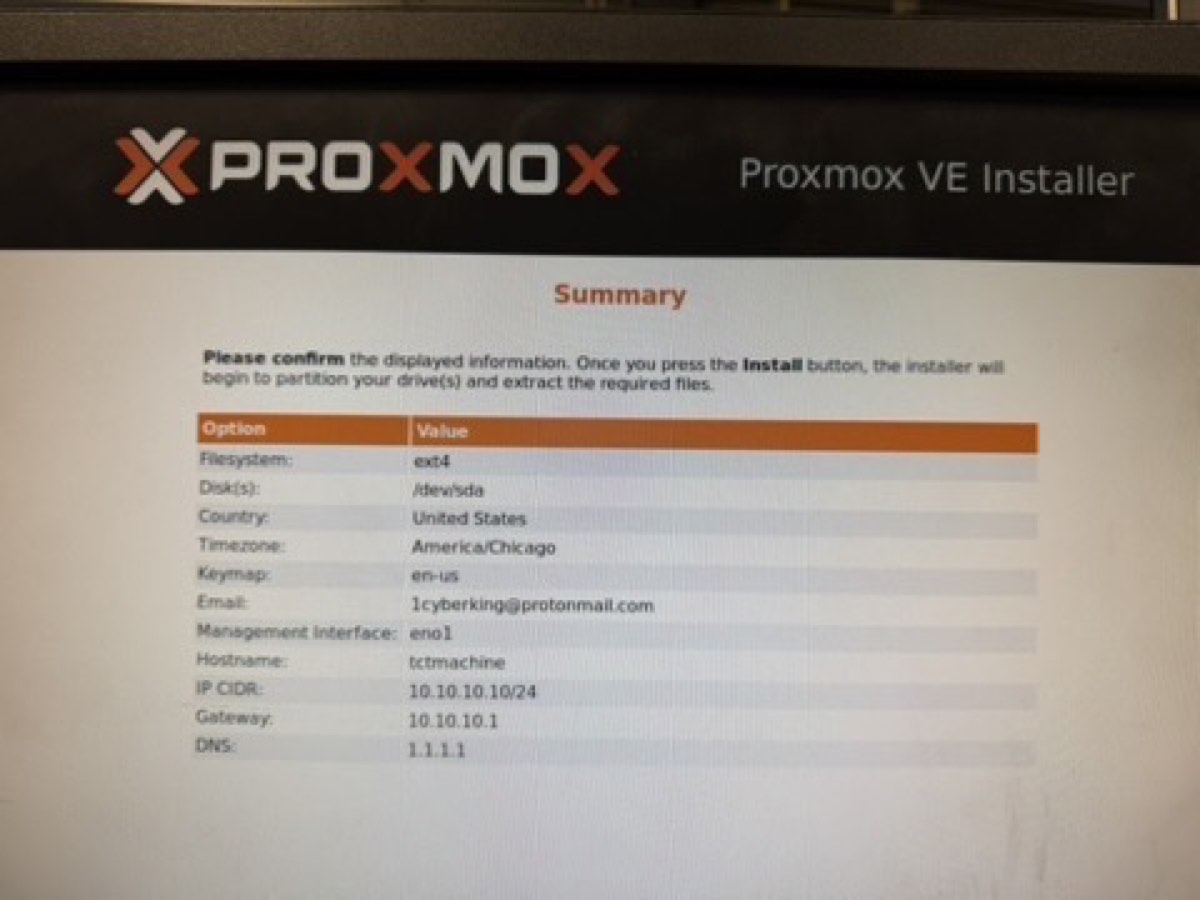
Final installer summary — then clicked Install
What we installed with
Filesystem
ext4 on /dev/sda
Target disk
3 TB RAID 5 array
Country / TZ
United States / America/Chicago
Management NIC
eno1
Hostname
tctmachine
IP (CIDR)
10.10.10.10/16
Gateway
10.10.10.1
DNS
1.1.1.1 (Cloudflare)
Install ran ~5 minutes, unmounted the virtual ISO, rebooted — Proxmox came up on the first try.
Chapter 3 · Proof of Life
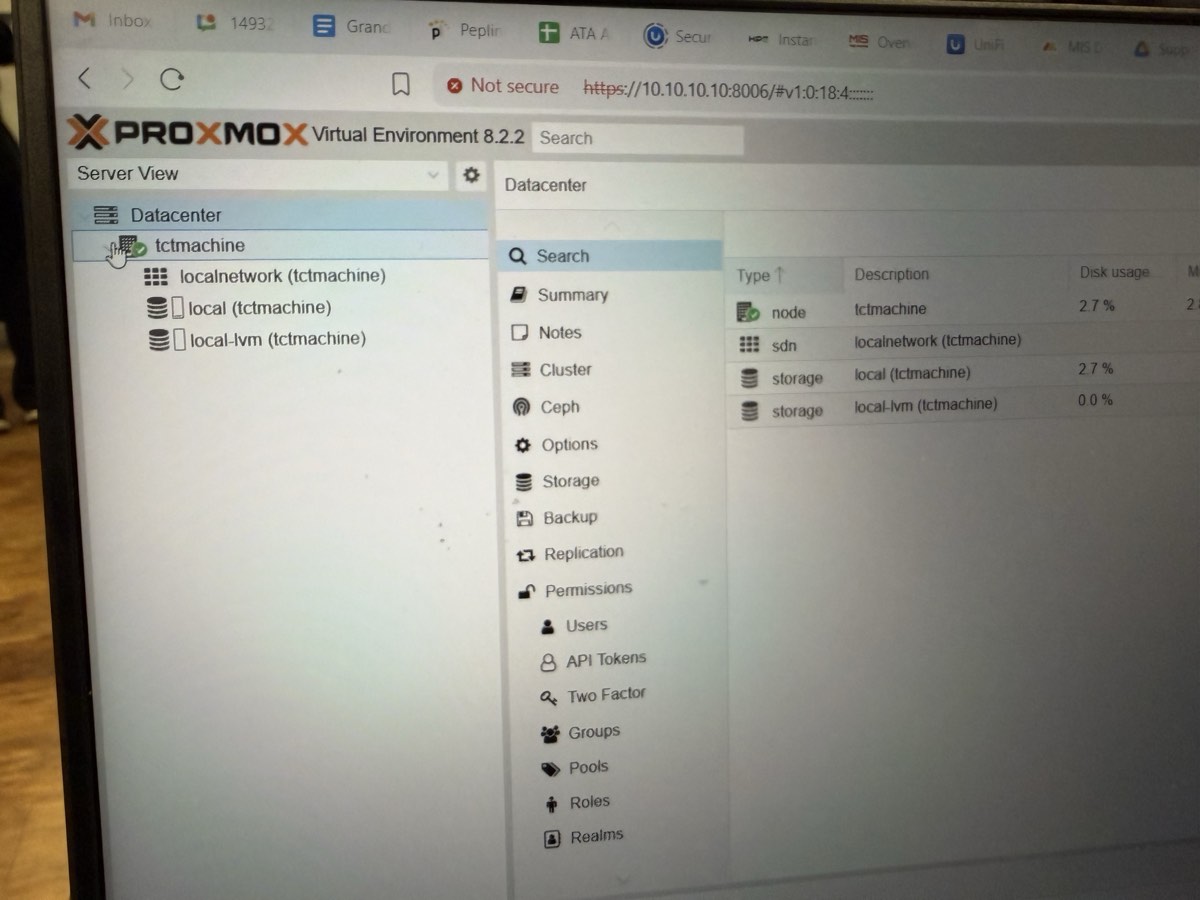
Web UI reached from a browser
↑ https://10.10.10.10:8006 from a laptop on the school LAN. Logged in as root.
What the dashboard confirmed
✓Proxmox VE 8.2.2 running
✓ Node tctmachine online under Datacenter
✓localnetwork SDN exists
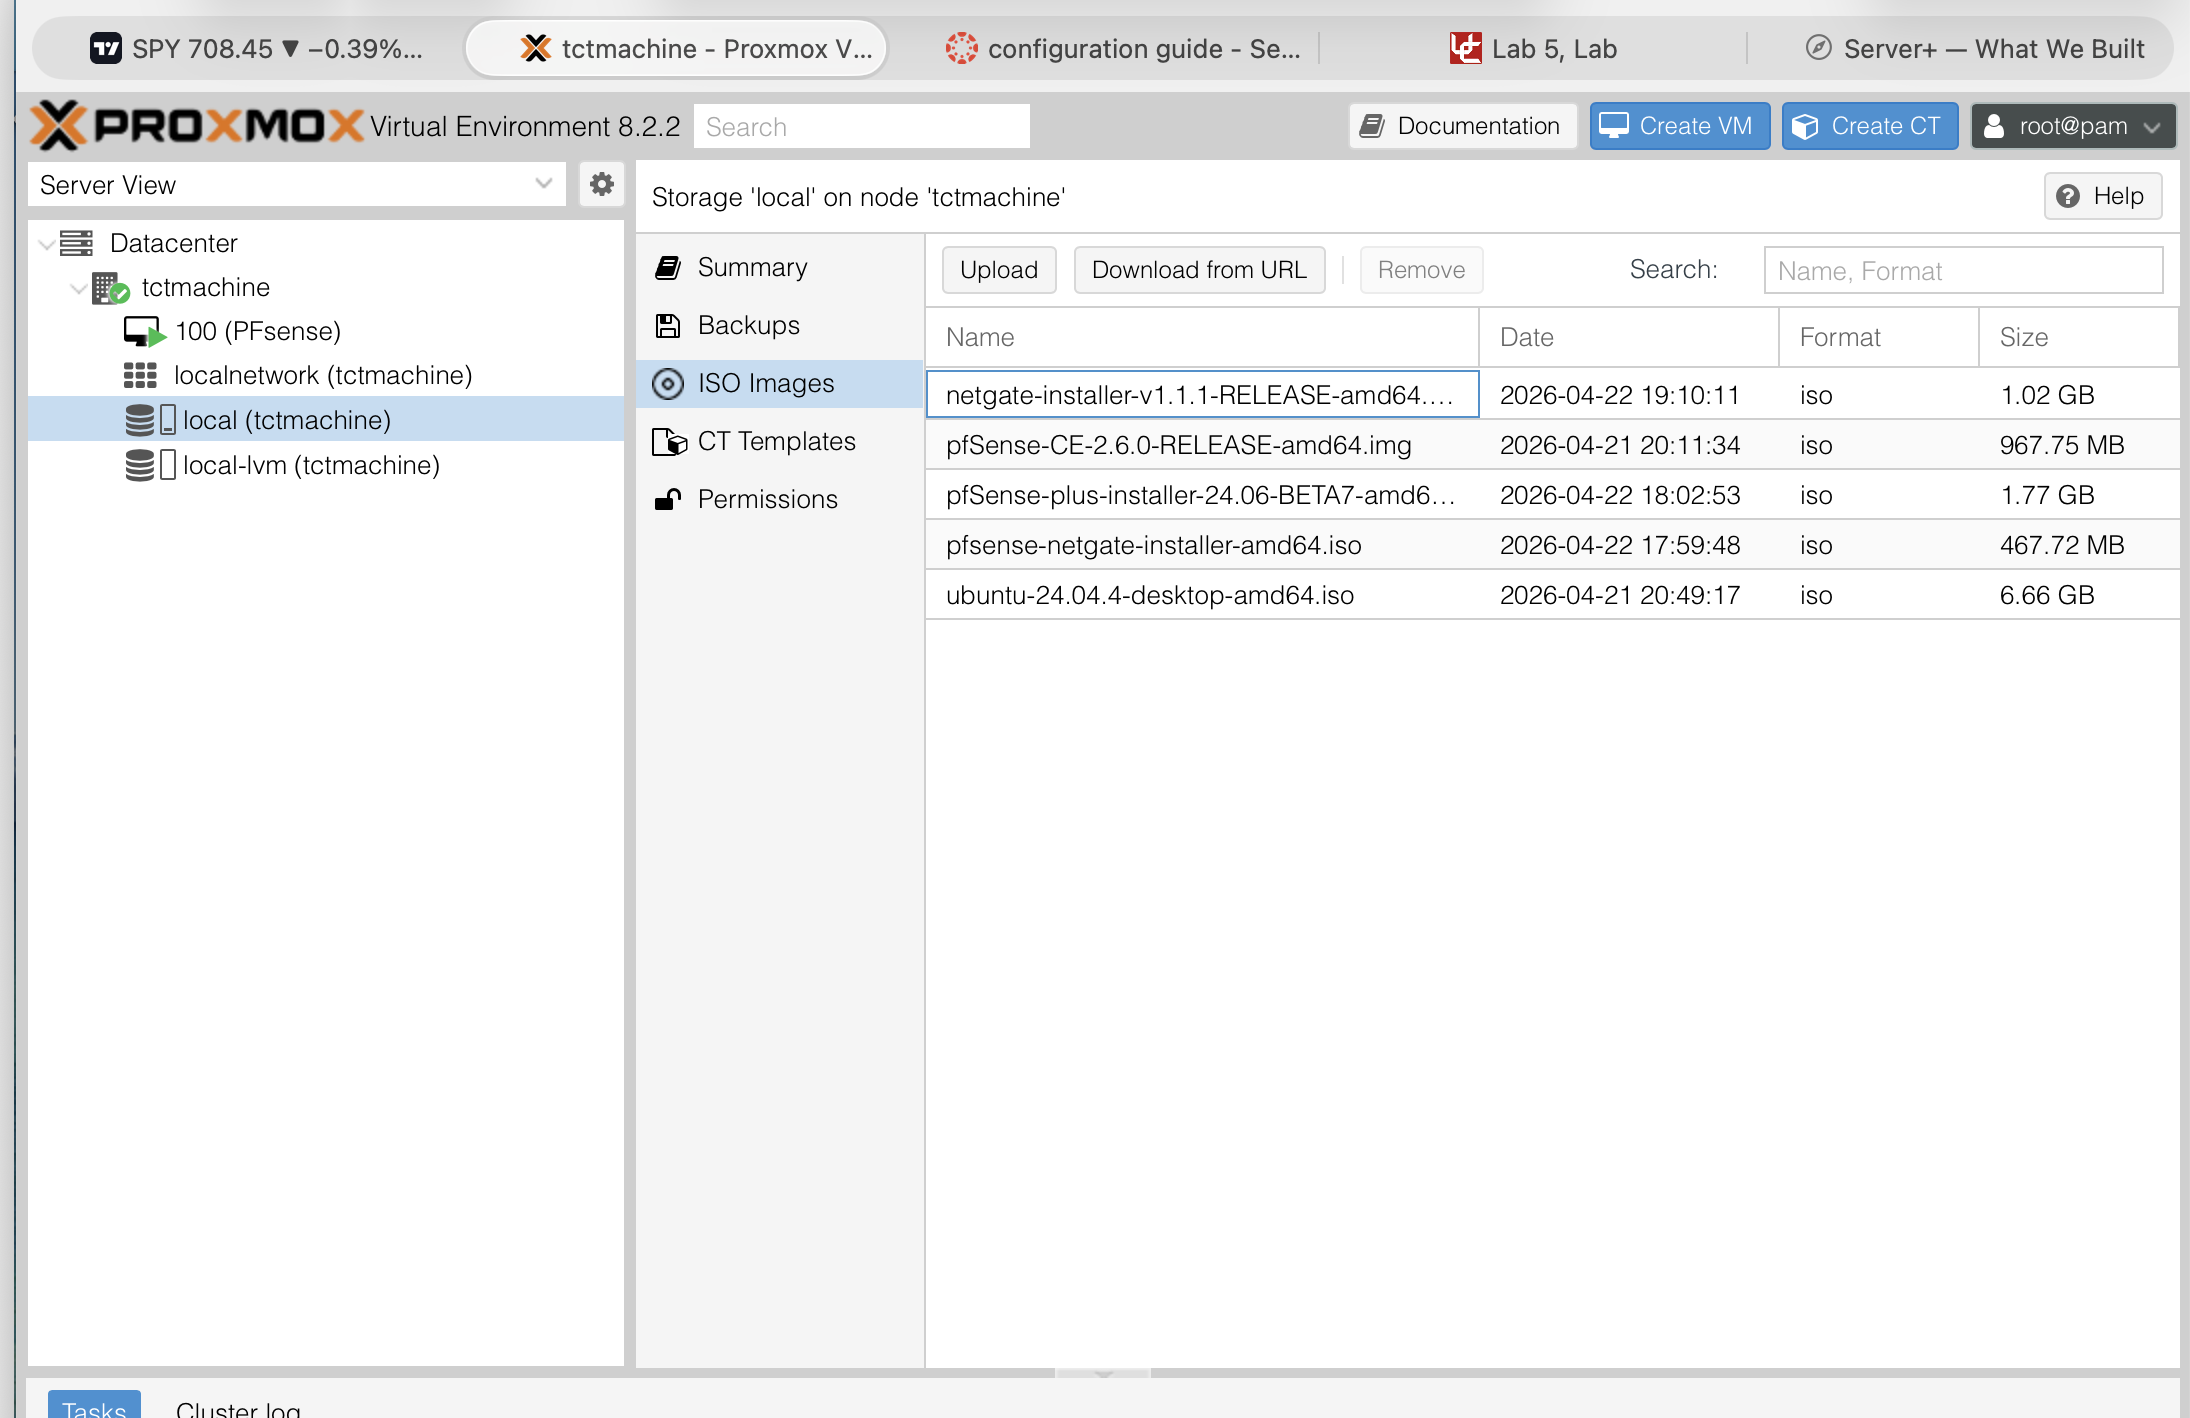
✓local storage mounted · 2.7% used (base system)
✓local-lvm thin pool ready · 0.0% used (awaiting VMs)
✓ Authentication, TLS, web stack all functional
What this means
Every layer from iLO up through Proxmox UI is working. The 3 TB RAID 5 array is exposed as local (host root + ISOs) and local-lvm (VM disks). Ready to create bridges and VMs next.
Where We Are Today
Proxmox VE 8.2.2 is live
Week 1 ✓ complete
✓ Every component identified and documented
✓ iLO 4 configured for remote management
✓ RAID 5 array built on 3× 1 TB SATA (3 TB total)
✓ Proxmox VE 8.2.2 installed on the array
✓ Management IP 10.10.10.10/16 on eno1
✓ Web UI live at https://10.10.10.10:8006
✓ Internet reachable (DNS 1.1.1.1)
Proof — screenshots captured
POST banner with RAID 5 present + 1785 error cleared
ORCA main menu showing the logical drive
Proxmox installer summary
Proxmox login / dashboard
Known follow-ups
Rename host → pve01.capstone.local (hostnamectl)
Run apt update && full-upgrade
Enable no-subscription repo
Record FBWC cache size + capacitor status
Weekly SMART check on all 3 drives (WD RE3 is 15 yrs old)
Week 2 · Services Week
What we're deploying and where
🎯 Objective
Stand up the core services every downstream week depends on — Windows DNS/DHCP/IIS + Linux NGINX/MariaDB — on a NAT-bridged network.
CREATE DATABASE capstone_db;

CREATE USER 'capuser'@'localhost'
  IDENTIFIED BY 'securepass';

GRANT ALL PRIVILEGES ON capstone_db.*
  TO 'capuser'@'localhost';

FLUSH PRIVILEGES;
EXIT;
Verify
mysql -u capuser -p -e "SHOW DATABASES;"
| capstone_db        |
📸 Screenshot the SHOW DATABASES; output with capstone_db visible.
Break something, restore it, document the recovery
Rehearse the demo walkthrough twice
Sealed runbook with every password + recovery plan
Planned VM Layout
4 VMs sized for 32 GB / 4 cores
VM
Purpose
OS
vCPU
RAM
Disk
Bridge
IP
VM1
AD / DNS / DHCP / IIS
Windows Server 2019
2
8 GB
80 GB
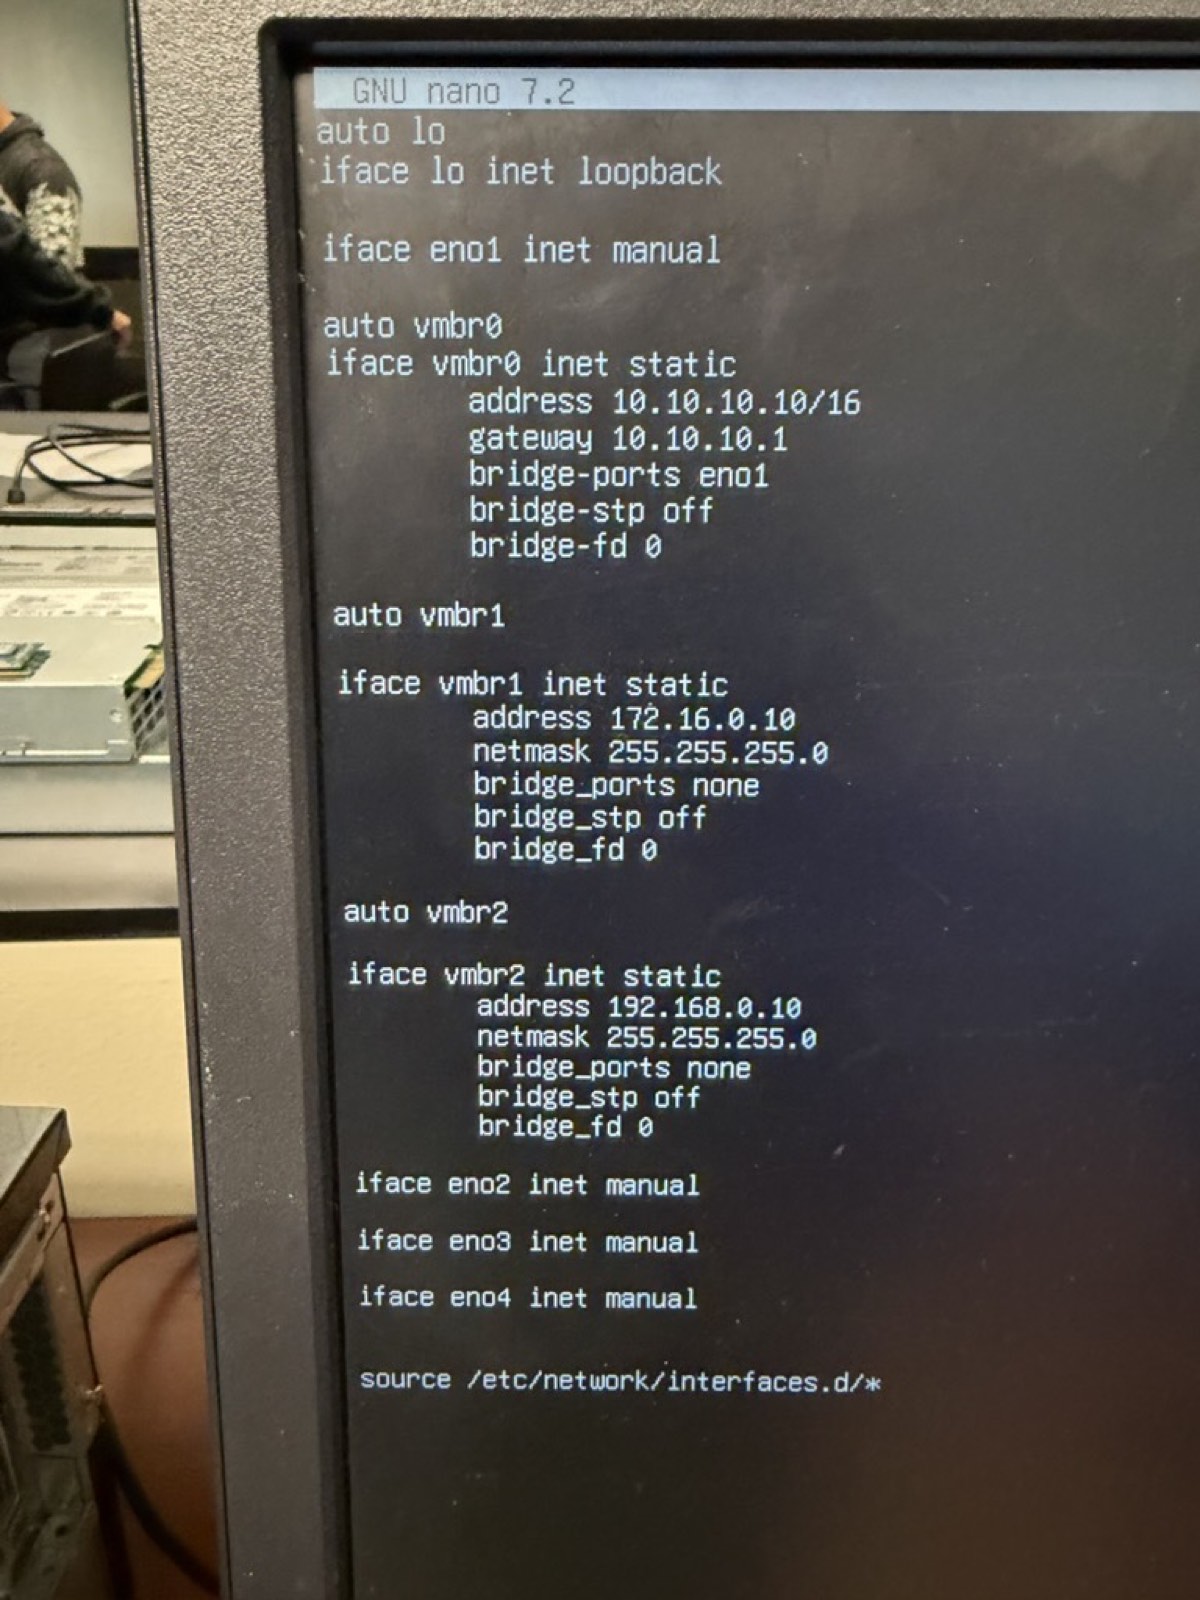
vmbr2
192.168.0.10
VM2
SQL Server Express
Windows Server 2019
2
6 GB
80 GB
vmbr2
192.168.0.20
VM3
Apache + MySQL web
Ubuntu 22.04 LTS
2
4 GB
40 GB
vmbr1
172.16.0.10
VM4
Jump box / gateway
Windows / Ubuntu
1
2 GB
30 GB
vmbr1
172.16.0.20
Totals
7
20 GB
230 GB
Leaves ~10 GB RAM for host + ARC
⚠ No Hyper-Threading on E5-2609 v2 — 7 vCPU on 4 real cores = ~1.75× over-subscription, acceptable for lightly-loaded services. Keep CPU-heavy workloads off the same host.
Deliverables
What the instructor gets
Documentation
Week 1 report form — all fields filled with real values
Server Hardware Discovery Sheet — 12 sections, completed